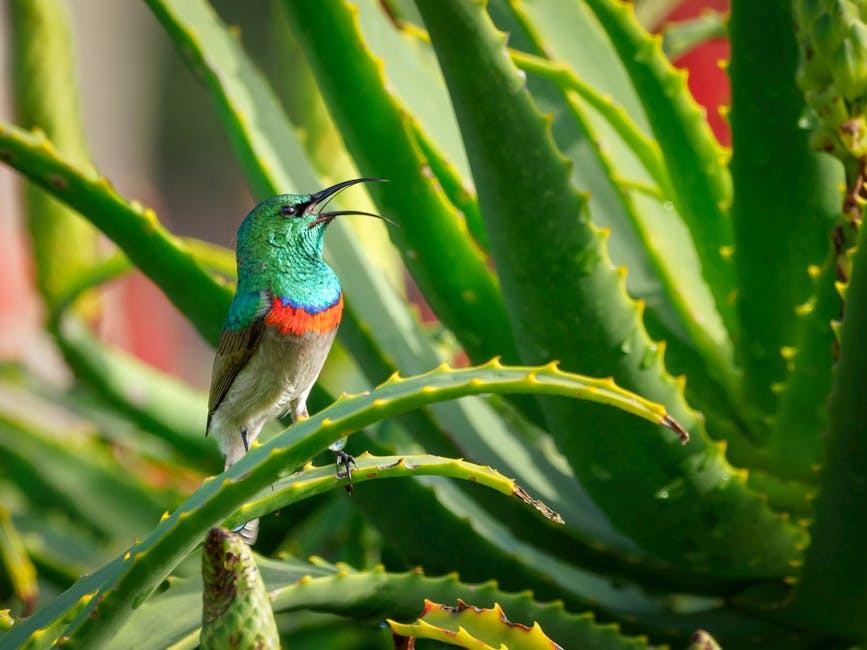
Hummingbirds are one of the most captivating birds due to their unique abilities to hover, fly backward, and reach blazing speeds. Yet, to maintain these strengths, they are utterly dependent on a high-energy diet. At the heart of this diet is nectar, a sweet fluid produced by many Flowers. Nectar is vital to hummingbirds’ survival as it supplies the immediate energy demands of their notably fast metabolism.
Pro tip:🔑 Despite their small size, hummingbirds need to eat roughly every 10 minutes, and astonishingly, they can consume up to 50% of their body weight in a day!
Fast and high-energy flights characterize hummingbirds. To sustain this agility, they require a diet rich in energy, which is largely derived from the sugars found in nectar. Hummingbirds have the highest metabolism of any bird species, which is essential to keep in mind when considering their nutrition.
Nutritional Elements of Nectar
Natural nectar is primarily composed of sugars such as glucose, fructose, and sucrose, which provide hummingbirds with the energy they need to maintain their metabolic rate. Moreover, it contains tiny amounts of essential minerals and nutrients that support their overall health.
The allure of commercial hummingbird nectar might be its ease and accessibility. Yet, bird enthusiasts should approach these store-bought alternatives with caution. Not all commercial nectars mirror the nutritional balance of natural nectar. Some may contain artificial preservatives and dyes harmful to hummingbirds.
Best practice:📝 Always peruse the labels for any artificial preservatives or dyes when buying commercial hummingbird nectar. Opting for products with natural ingredients is always a safer bet.
Benefits of DIY Hummingbird Nectar
Crafting homemade hummingbird nectar is beneficial, both for the birds and the budding ornithologist. Not only does it ensure control over the ingredients used, thereby over their health, but it is also a cost-effective alternative.
The advantages of DIY nectar are immense. Some of them are:
- Control over ingredients: With DIY nectar, you will have full knowledge of what you are feeding the hummingbirds, ensuring it is devoid of any harmful substances.
- Economic: Homemade nectar is cost-effective, requiring only sugar and water.
- Bonding with nature: Creating your own nectar can enhance your connection with nature by attracting these vibrant birds to your backyard.
Pro tip:🔑 Experimentation with the sugar-water ratio in the DIY nectar could attract different hummingbird species. Striking a balance is key, though, as too much sugar can be harmful.
Easy DIY Hummingbird Nectar Recipe
Making hummingbird nectar at home is straightforward and requires only two ingredients: sugar and water. The process, from boiling to cooling, is easy enough for anyone to perfect.
Checklist:
- A cup of white, granulated sugar.
- Four cups of water.
- A pot for boiling.
- A feeder to store your nectar. – Cleaning materials, such as a mild detergent and bottle brush for your feeder.
Instructions:
- Bring four cups of water to boil in a clean pot.
- Once the water is boiling, add one cup of sugar.
- Stir the mixture until the sugar fully dissolves.
- Remove the pot from the heat and allow the homemade nectar to cool.
- Once cool, carefully fill your clean hummingbird feeder.
- Store any leftover nectar in the refrigerator for up to a week, ready for the next refill.
Maintaining and Replacing Hummingbird Nectar
Taking care of your feeder and its contents is crucial for the health of visiting hummingbirds. As the nectar sits outside, it can ferment or mold, both of which can be harmful to the birds. It’s recommended to replace the nectar every two to three days, or more often in hot weather.
Cleaning your feeder regularly is as important as providing fresh nectar. Rinse thoroughly with warm water and mild detergent, followed by a final rinse of just water to ensure no soap is left behind. Inspect your feeders often for any signs of mold or cloudiness in the nectar, which indicate it’s time for a change.
Comparison: Fresh vs. spoiled nectar
| Characteristics | Fresh Nectar | Spoiled Nectar |
|---|---|---|
| Color | Clear | Cloudy or discolored |
| Texture | Smooth | Slimy or fizzy |
| Smell | Neutral or mildly sweet | Off odor or sour |
Best practices:
- clean and refill hummingbird feeders every 2-3 days
- more often in warmer weather
- rinse thoroughly with mild detergent and hot water
- always refill with cool nectar
- store leftover nectar in the refrigerator
- inspect feeders daily for signs of mold or spoiled nectar
With these tips and your easy DIY nectar, your backyard will soon become a hummingbird haven!
Key Takeaway:
- Hummingbird nectar, whether natural or homemade, is vital to the bird’s survival as it provides energy for hummings’ high metabolic needs.
- Natural nectar contains sugars and essential nutrients, which are often replicated in commercial versions. However, some commercial nectars may contain artificial preservatives that can harm hummingbirds.
- Creating your own hummingbird nectar has many benefits, including control over ingredients, cost-effectiveness, and enhanced connection with nature.
- Maintaining fresh nectar is crucial, and it should be replaced every 2-3 days to prevent fermentation or mold. Rigorous cleaning of feeders is also essential to keep hummingbirds healthy.
Nurturing hummingbirds doesn’t have to be a Herculean task. With a simple homemade nectar recipe and mindful maintenance, you’re not far from transforming your backyard into a hummingbird sanctuary. Remember, your efforts contribute to the vitality and conservation of these beautiful creatures.
FAQs
Q: What sugar should I use to make homemade hummingbird nectar?
A: Use ordinary white, granulated sugar to make hummingbird nectar. Avoid using any colored or flavored sugar as these could be harmful to the birds.
Q: Can I add red dye to my homemade nectar to attract more hummingbirds?
A: It’s not recommended to add red dye or any other artificial color to your homemade nectar. Hummingbirds are naturally attracted to red, so having a red-colored feeder is usually enough. Plus, dyes can be harmful to the birds.
Q: How often should I clean my hummingbird feeder?
A: You should clean your hummingbird feeder every time you change the nectar, which is every 2 to 3 days. This helps keep the feeder free from mold and other potential contaminants.
Q: How can I store leftover hummingbird nectar?
A: Storing leftover hummingbird nectar is simple. Keep it in a clean, airtight container in the refrigerator. It should last up to a week.
Q: What if hummingbirds are not coming to my feeder?
A: If hummingbirds are not visiting your feeder, try moving it to a quiet and safe location. You can also increase visibility by placing it near flowers or adding a red ribbon to it. Patience is key as it can take time for hummingbirds to find your feeder.
Thanks for reading! Don’t forget to share this post with fellow bird-lovers and check out other posts on our blog for more insights into the wonderful world of birds.